k8s 高可用集群环境搭建
前期初始化准备:
1: 环境设定
主机名:
hostnamectl set-hostname k8s-master01
hostnamectl set-hostname k8s-master02
hostnamectl set-hostname k8s-node01
hostnamectl set-hostname k8s-node02
hostnamectl set-hostname k8s-harbor
修改 /etc/hosts
cat >> /etc/hosts << EOF
192.168.1.130 k8s-master01
192.168.1.133 k8s-master02
192.168.1.129 k8s-node01
192.168.1.132 k8s-node02
EOF
关闭 swap
swapoff -a
yes | cp /etc/fstab /etc/fstab_bak
cat /etc/fstab_bak | grep -v swap > /etc/fstab
时间同步
cp /etc/chrony.conf{,.bak}
sed -i 's/^server/#&/' /etc/chrony.conf
cat >> /etc/chrony.conf << EOF
server 0.asia.pool.ntp.org iburst
server 1.asia.pool.ntp.org iburst
server 2.asia.pool.ntp.org iburst
server 3.asia.pool.ntp.org iburst
EOF
timedatectl set-timezone Asia/Shanghai
systemctl enable chronyd && systemctl restart chronyd
安装依赖包:
yum install -y conntrack ipvsadm ipset jq iptables curl sysstat libseccomp wget vim net-tools git
设置防火墙为 iptables 并设置空规则
systemctl stop firewalld && systemctl disable firewalld
yum install -y iptables-services && systemctl start iptables && systemctl enable iptables && iptables -F && service iptables save
配置内核参数
cat > /etc/sysctl.d/k8s.conf <<EOF
net.bridge.bridge-nf-call-ip6tables = 1
net.bridge.bridge-nf-call-iptables = 1
net.ipv4.ip_nonlocal_bind = 1
net.ipv4.ip_forward = 1
vm.swappiness=0
vm.overcommit_memory=1
vm.panic_on_oom=0
fs.inotify.max_user_instances=8192
fs.inotify.max_user_watches=1048576
fs.file-max=52706963
fs.nr_open=52706963
net.ipv6.conf.all.disable_ipv6=1
net.netfilter.nf_conntrack_max=2310720
EOF

sysctl --system
关闭系统不需要服务
systemctl stop postfix && systemctl disable postfix
设置 rsyslog 和 systemd journald
mkdir /var/log/journal
mkdir /etc/systemd/journald.conf.d
cat > /etc/systemd/journald.conf.d/99-prophet.conf << EOF
[Journal]
# 持久化保存到磁盘
Storage=persistent

# 压缩历史日志
Compress=yes

SyncIntervalSec=5m
RateLimitInterval=30s
RateLimitBurst=1000

# 最大占用空间 10G
SystemMaxUse=10G

# 单日志文件最大 200M
SystemMaxFileSize=200M

# 日志保存时间 2 周
MaxRetentionSec=2week

# 不将日志转发到 syslog
ForwardToSyslog=no
EOF
systemctl restart systemd-journald
升级系统内核为最新
目的:运行 Docker 和 k8s 更稳定
yum install -y https://www.elrepo.org/elrepo-release-7.el7.elrepo.noarch.rpm
安装完成后检查 /boot/grub2/grub.cfg 是否包含 initrd16 配置,如没有,在安装一次
yum --enablerepo=elrepo-kernel install -y kernel-lt
设置开机从内核启动
grub2-set-default "Centos Linux (4.4.224-1.el7.elrepo.x86_64) 7 (Core)"
Kube-proxy 开启 ipvs 的前置条件
modprobe br_netfilter

cat > /etc/sysconfig/modules/ipvs.modules << EOF
#!/bin/bash
modprobe -- ip_vs
modprobe -- ip_vs_rr
modprobe -- ip_vs_wrr
modprobe -- ip_vs_sh
modprobe -- nf_conntrack_ipv4
EOF

chmod 755 /etc/sysconfig/modules/ipvs.modules && bash
/etc/sysconfig/modules/ipvs.modules && lsmod | grep -e ip_vs -e nf_conntrack_ipv4
安装 Docker
# step 1: 安装必要的一些系统工具
sudo yum install -y yum-utils device-mapper-persistent-data lvm2
# Step 2: 添加软件源信息
sudo yum-config-manager --add-repo https://mirrors.aliyun.com/docker-ce/linux/centos/docker-ce.repo
# Step 3: 更新并安装 Docker-CE
sudo yum makecache fast
sudo yum -y install docker-ce
# Step 4: 开启 Docker 服务
sudo service docker start
service docker enable
# 配置 daemon
mkdir /etc/docker
cat > /etc/docker/daemon.json <<EOF
{"exec-opts": ["native.cgroupdriver=systemd"],
  "log-driver": "json-file",
  "log-opts": {"max-size": "100m"},
  "storage-driver": "overlay2",
  "storage-opts": [
	"overlay2.override_kernel_check=true"
  ],
  "registry-mirrors": ["https://4zcr0gon.mirror.aliyuncs.com"]
}
EOF
存放 docker 的生成文件
mkdir -p /etc/systemd/system/docker.service.d
重启
systemctl daemon-reload && systemctl restart docker && systemctl enable docker
安装 kubeadm
cat <<EOF > /etc/yum.repos.d/kubernetes.repo
[kubernetes]
name=Kubernetes
baseurl=https://mirrors.aliyun.com/kubernetes/yum/repos/kubernetes-el7-x86_64/
enabled=1
gpgcheck=1
repo_gpgcheck=1
gpgkey=https://mirrors.aliyun.com/kubernetes/yum/doc/yum-key.gpg https://mirrors.aliyun.com/kubernetes/yum/doc/rpm-package-key.gpg
EOF

setenforce 0


yum install -y --nogpgcheck kubelet kubeadm kubectl
systemctl enable kubelet && systemctl start kubelet
初始化主节点
默认的主配置文件
kubeadm config print init-defaults > kubeadm-config.yaml
将
advertiseAddress: 监听地址(0.0.0.0)imageRepository: 由于国内无法访问 google 镜像仓库 k8s.gcr.io,这里指定为阿里云镜像仓库 registry.aliyuncs.com/google_containers
podSubnet: 指定的 IP 地址段与后续部署的网络插件相匹配,这里需要部署 flannel 插件,所以配置为 10.244.0.0/16
添加
apiVersion: kubeproxy.config.k8s.io/v1alpha1
kind: KubeProxyConfiguration
featureGates:
  SupportIPVSProxyMode: true
mode: ipvs
最新(2020/07/30)改动:
apiVersion: kubeadm.k8s.io/v1beta2
bootstrapTokens:
- groups:
  - system:bootstrappers:kubeadm:default-node-token
  token: abcdef.0123456789abcdef
  ttl: 24h0m0s
  usages:
  - signing
  - authentication
kind: InitConfiguration
localAPIEndpoint:
  advertiseAddress: 0.0.0.0
  bindPort: 6443
nodeRegistration:
  criSocket: /var/run/dockershim.sock
  name: node
  taints: null
---
apiServer:
  timeoutForControlPlane: 4m0s
apiVersion: kubeadm.k8s.io/v1beta2
certificatesDir: /etc/kubernetes/pki
clusterName: kubernetes
controllerManager: {}
dns:
  type: CoreDNS
etcd:
  local:
    dataDir: /var/lib/etcd
imageRepository: registry.cn-hangzhou.aliyuncs.com/google_containers
kind: ClusterConfiguration
kubernetesVersion: 1.21.0
networking:
  dnsDomain: cluster.local
  podSubnet: 10.244.0.0/16
  serviceSubnet: 10.96.0.0/12
scheduler: {}
初始化
kubeadm init –config=kubeadm-config.yaml –upload-certs | tee kubeadm-init.log
初始化可能会出现部分镜像拉取不了,最好的方法是通过 docker 去拉取,例:拉取 coredns:v1.8.0 失败
error execution phase preflight: [preflight] Some fatal errors occurred:
[ERROR ImagePull]: failed to pull image registry.cn-hangzhou.aliyuncs.com/google_containers/coredns:v1.8.0: output: Error response from daemon: manifest for registry.cn-hangzhou.aliyuncs.com/google_containers/coredns:v1.8.0 not found: manifest unknown: manifest unknown
, error: exit status 1
docker pull coredns/coredns:v1.8.0
拉取成功后,将次镜像重新打个 tag
docker tag coredns/coredns registry.cn-hangzhou.aliyuncs.com/google_containers/coredns:v1.8.0成功后会提示:
mkdir -p $HOME/.kube
sudo cp -i /etc/kubernetes/admin.conf $HOME/.kube/config
sudo chown $(id -u):$(id -g) $HOME/.kube/config
若存在需要 kubeadm 重新初始化集群的问题:
1、移除所有工作节点
例:kubectl delete node node
2、所有工作节点删除工作目录,并重置 kubeadm
rm -rf /etc/kubernetes/*
kubeadm reset
3、Master 节点删除工作目录,并重置 kubeadm
rm -rf /etc/kubernetes/*
rm -rf ~/.kube/*
rm -rf /var/lib/etcd/*
kubeadm reset -f
4、重新 init kubernetes
安装 flannel 插件
kubectl apply -f https://raw.githubusercontent.com/coreos/flannel/master/Documentation/kube-flannel.yml亦可通过本地生效
kubectl create -f kube-flannel.yml
检查
kubectl get pod -n kube-system
kubectl get nodes
若出现:coredns 一直在 pending 状态,即可参照上面重新打 tag 来生效
子节点加入(看 kubeadm-init.log)
kubeadm join 172.26.94.86:6443 --token abcdef.0123456789abcdef \
        --discovery-token-ca-cert-hash sha256:687d002c1ac42ea1102b275260b4d1b8f502e53fe2e537902121aaf0240e6e60(此处参照 kubeadm 生成的,不可直接复制使用)
添加主节点
在 master 上生成用于新 master 加入的证书

1
kubeadm init phase upload-certs --experimental-upload-certs

cb056fc432d1510e77c319150693751b4741273964d3b049b3b5d4fee324c977

添加新 master,把红色部分加到 --experimental-control-plane --certificate-key 后。kubeadm join 172.26.94.86:6443 --token abcdef.0123456789abcdef \
        --discovery-token-ca-cert-hash sha256:687d002c1ac42ea1102b275260b4d1b8f502e53fe2e537902121aaf0240e6e60 \
        --control-plane --certificate-key cb056fc432d1510e77c319150693751b4741273964d3b049b3b5d4fee324c977
检查(主节点)
展示节点详细
kubectl get pods -o wide -n kube-system
kubectl get pods -o wide -n kube-system -w![[ root@k8s -maste r€)l
flannel ] #
NAME
coredns -7ff77c879f -9m rtb
co redns -7ff77c879f -h rg5q
kubectl
get pod
READY
1/1
1/1
1/1
1/1
1/1
1/1
1/1
1/1
1/1
1/1
1/1
-n kube-system -w
etcd- k8s -maste r01
kube - apise rver- k8s
-master€)l
STATUS
Running
Running
Running
Running
Running
Running
Init: 0/1
Running
Running
Running
Running
Running
RESTARTS
1
2
kube -cont roller -manager- k8s
kube - flannel - ds - amd64 - gz 78b
kube - flannel -ds - amd64-h6jmg
kube - flannel -ds - amd64 - j zms9
kube -proxy - k4mvs
kube-proxy -mqfm9
kube -p roxy -pf kp8
kube -scheduler - k8s -maste r€)l
-master€)l
AGE
29m
29m
30m
30m
30m
3m29s
3m23s
10m
3m23s
29m
3m29s
30m](https://leonli.ltd/wp-content/uploads/2021/07/image-1.png)
kubectl get nodes
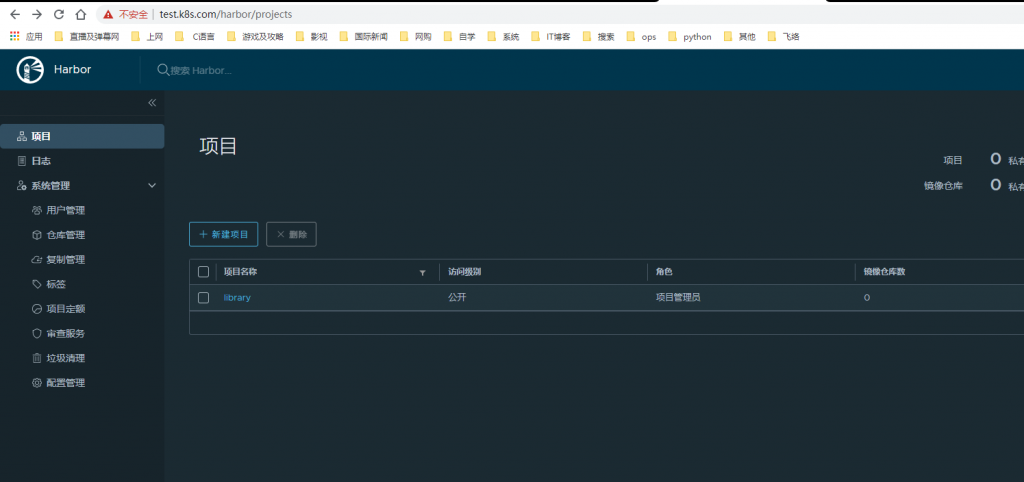
Harbor 的搭建
提前将内核升级、docker 安装、docker-compose 环境安装好
离线安装 harbor,登录 https://github.com/goharbor/harbor/releases 下载 offline 包
其中:
将 docker 的 daemon.json 文件中添加,(每个主机都加)
“insecure-registries”: [“https://test.k8s.com“],
解压包
备份好 harbor.yml,后编辑
将 hostname 修改成 test.k8s.com
创建 HTTPS 证书
openssl genrsa -des3-out server.key 2048
openssl req -new -key server.key -out server.csr
cp server.key server.key.org
docker 去读私钥时含密码,去掉密码
openssl rsa -in server.key.org -out server.key
签证
openssl x509 -req -days 365 -in server.csr -signkey server.key -out server.crt
chmod a+x *
切换回 harbor 目录,运行 install.sh
sh install.sh
检查 docker-compose -f /usr/local/harbor/docker-compose.yml ps
安装好后,在自己的电脑的 host 文件里面添加
192.168.137.198 test.k8s.com
用网页访问 test.k8s.com,输入默认用户名,密码
admin
Harbor12345
测试:
在 node01 上登录
docker login https://test.k8s.com
登陆后在 library 里查看
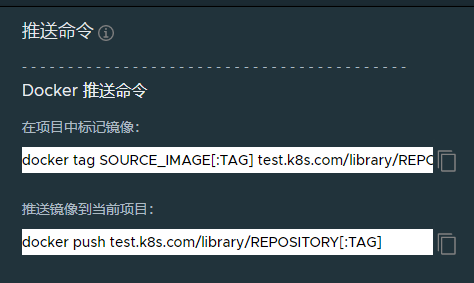
这里拿 hello-world 测试:
docker pull hello-world
docker tag library/hello-world test.k8s.com/library/hello-world:v1
docker push test.k8s.com/library/hello-world:v1
引用成功的,并部署在了 node02 上:
![[ root@k8s -master@l —]# kubectl
pod/hello-world created
[root@k8s -master@l —]# kubectl
error: the server doesn't have
[root@k8s -master€)l —]# kubectl
run hello-world
get hello-world
a resou rce type
get deployment
- -image=test . k8s . com/library/hello-world: VI
"hello-world"
No resources found in default namespace.
[ root@k8s -maste r01
NAME
READY
hello-world 0/1
[ root@k8s -maste r01
NAME
READY
—]# kubectl get pods
STATUS
C rashLoopBackOff
—]# kubectl get pods
STATUS
C rashLoopBackOff
RESTARTS
2
-o wide
RESTARTS
4
AGE
36s
AGE
2m4s
10. 244.2 2
NODE
k8s - node02
NOMINATI
hello-world 0/1](https://leonli.ltd/wp-content/uploads/2021/07/image-5.png)
